This post may contain affiliate links. Please read my disclosure policy.
All recipes on Doggone Baking are intended for humans — the dogs are just our enthusiastic photo assistants and taste-test spectators.
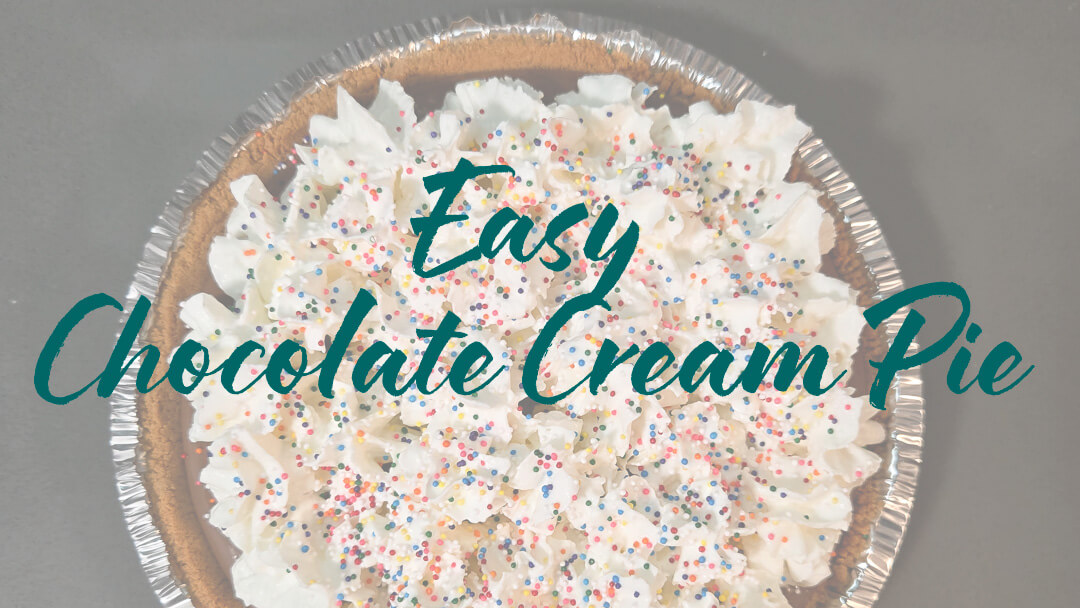
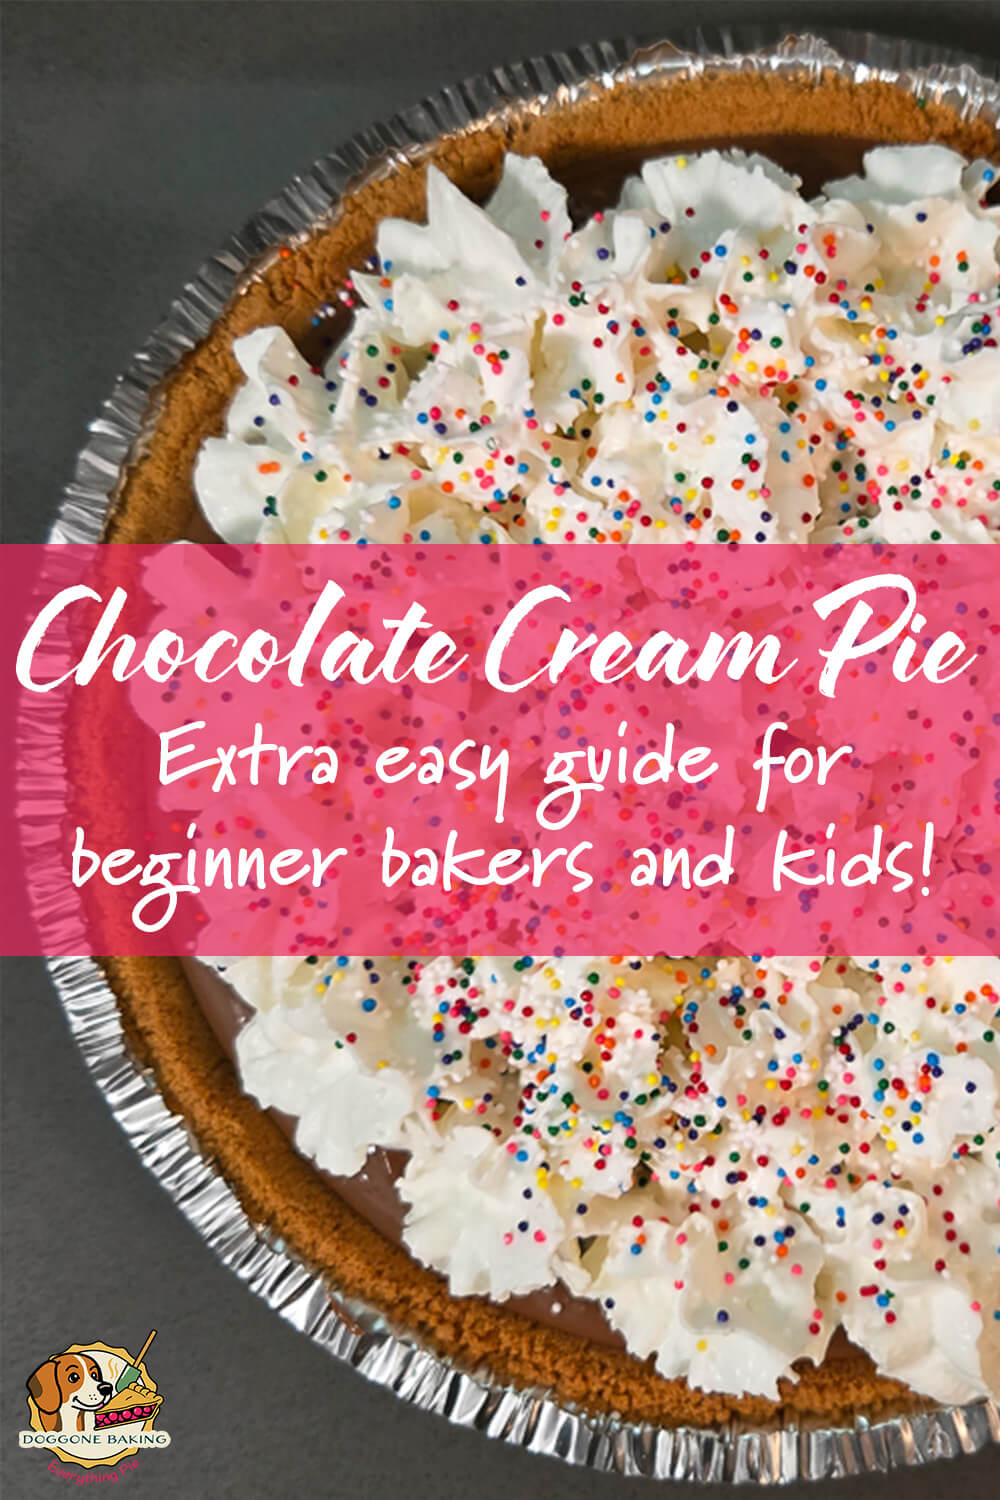
Easy Chocolate Cream Pie | Pie School Series
Welcome to Pie School! If you’ve ever said, “I can’t cook,” or if you just want a fun baking project to do with your kids, you’re in the right place. Today we’re making an easy chocolate cream pie that anyone can handle. You don’t need fancy tools or any baking experience, just a little patience and a love of chocolate.
We’ll start simple, then level up step by step until you reach Pie School graduation, when you’ll have the skills to bake my classic homemade chocolate cream pie completely from scratch.
Chocolate cream pie is one of the most popular pies in the world for a reason. It’s creamy, chocolatey, and perfect any time of year. In this lesson, I’ll walk you through a few different ways to make it, from the easiest assembly-only version to a fully homemade pie that tastes like it came from a bakery.

What Goes in a Chocolate Cream Pie?
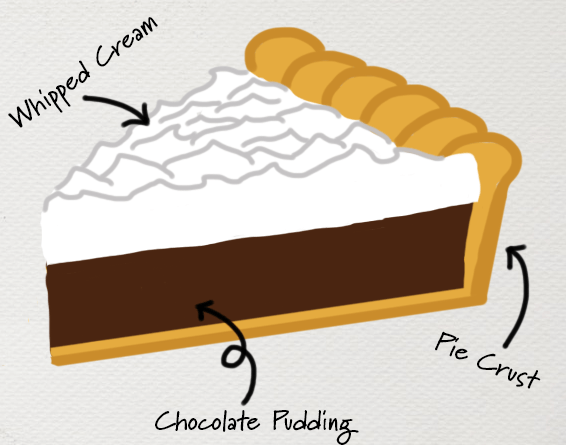
Chocolate cream pie, also called chocolate pudding pie, has three simple parts. The filling is chocolate pudding. The topping is fluffy whipped cream. For this easy chocolate cream pie, we will use a graham cracker crust. If you want an extra chocolatey pie, an Oreo crust tastes great too. We’ll break down these three parts: the crust, the chocolate pudding, and the whipped cream topping, into easy levels from store-bought to fully homemade.
- Crust: All pies need a crust. This pie is delicious in many crusts, including graham cracker, Oreo, or even a flaky pastry crust. For beginners, a store-bought graham cracker crust is perfect.
- Chocolate Cream: The filling is rich chocolate pudding. Homemade pudding tastes amazing, but it can feel tricky the first time. You can use instant pudding or even ready-to-eat pudding cups if you want a no-bake start. If using instant pudding, you want a 3.9oz box, and if using ready-to-eat pudding cups you want about 8 little cups.
- Whipped Cream: Most chocolate cream pies are topped with whipped cream. Fresh whipped cream tastes the best. Store-bought whipped cream or Cool Whip also works and keeps the process simple.
We will go through each part step by step, starting with the easiest version and moving toward fully homemade. You’ll be making perfect chocolate cream pies in no time.
Crust Options for Chocolate Cream Pie:
Every pie starts with a crust. For chocolate cream pie, you can choose how simple or fancy you want to go. Each option will give you a delicious pie, so pick the one that feels right for you.
Easiest Crust for Chocolate Cream Pie:
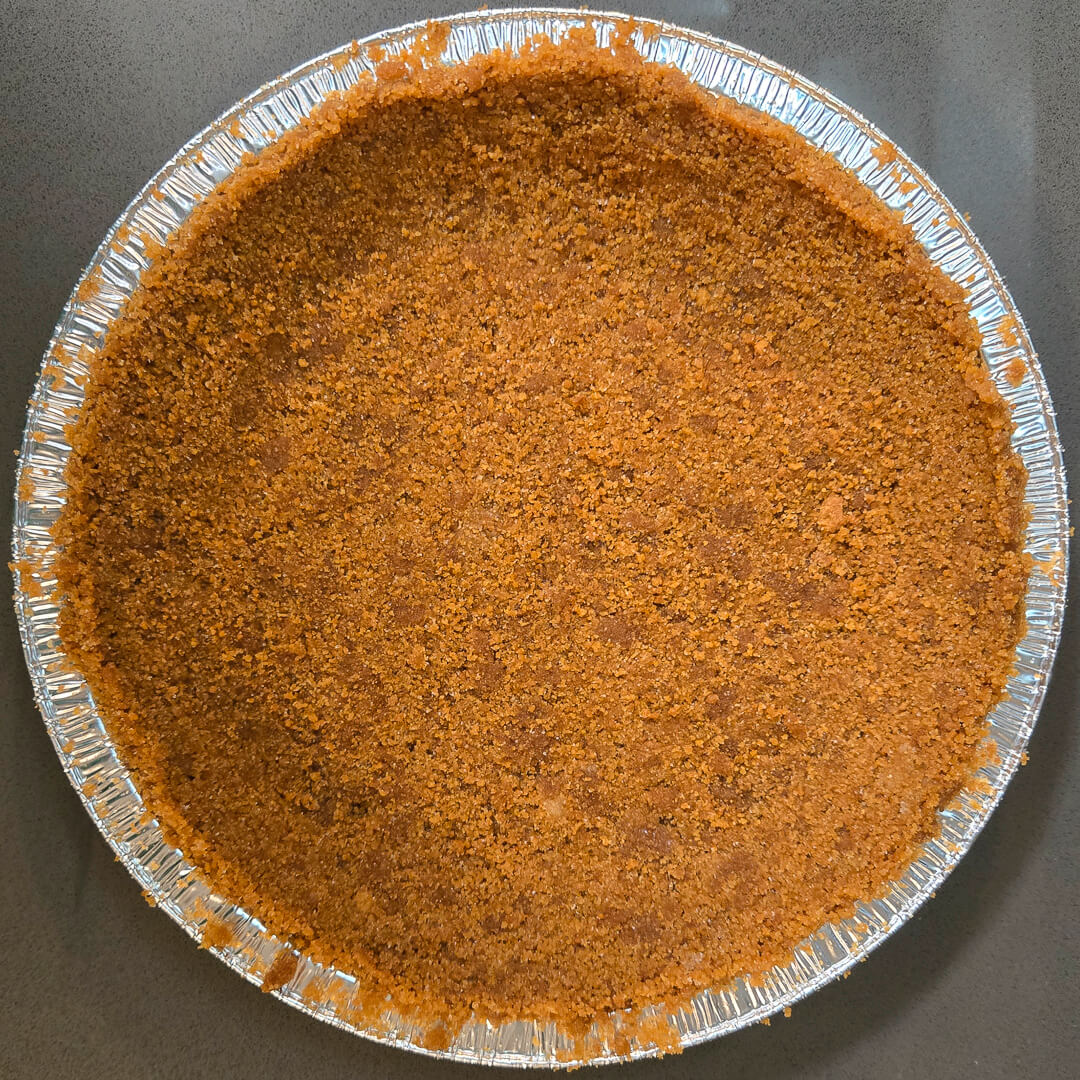
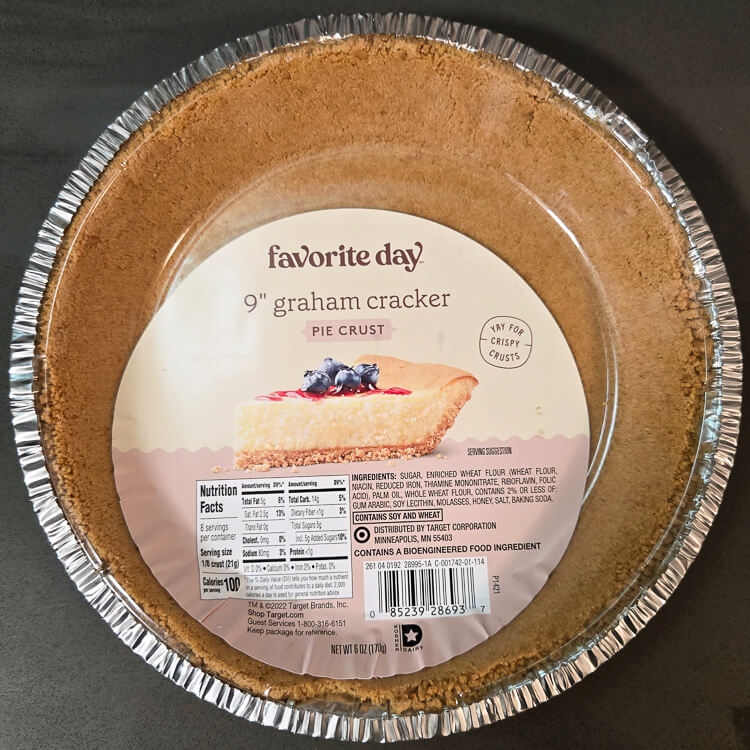
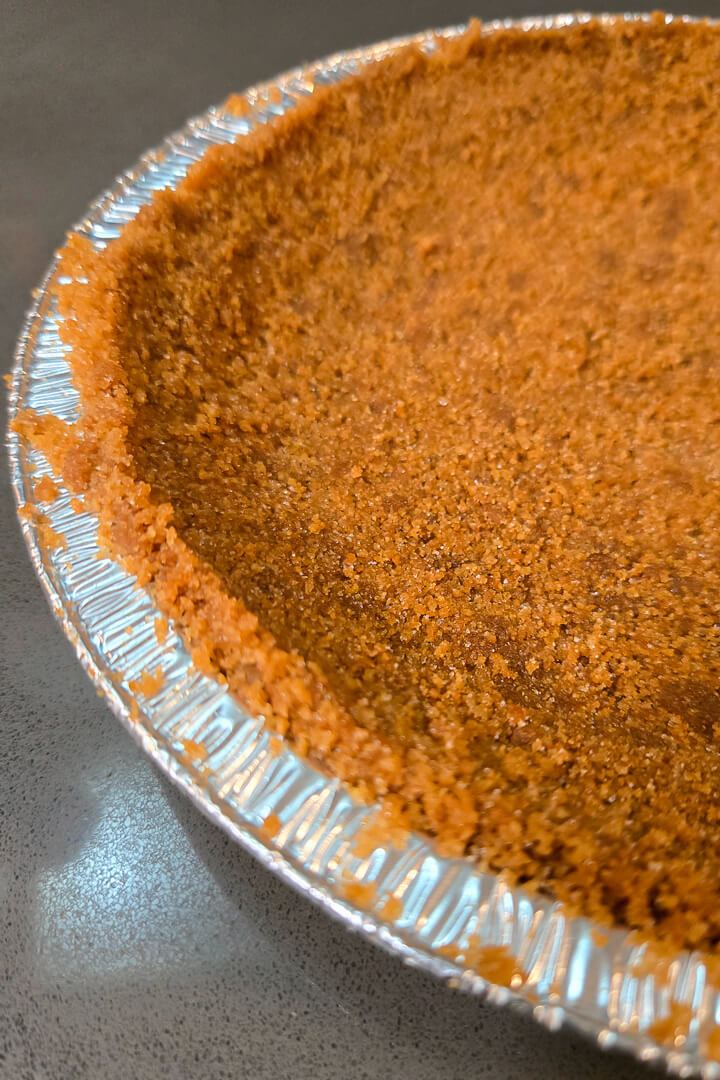
The easiest crust is a store-bought graham cracker crust. You can find it in the baking aisle at almost any grocery store. Look for one without too many cracks and with crumbs that go all the way up the sides. These crusts are affordable, quick, and ready to use.
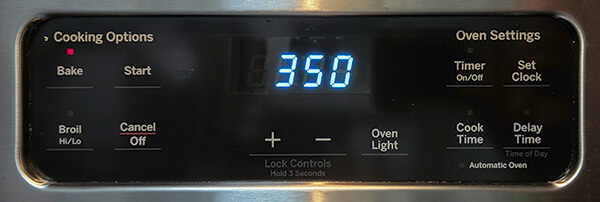
To make it taste a little more homemade, place the crust on the middle rack of a 350°F oven for about 8 to 10 minutes. This helps it brown and crisp up a bit. Let it cool completely before adding your pudding filling.
Level It Up: Homemade Graham Cracker Crust for Chocolate Cream Pie:
Graham cracker crusts are one of the easiest pie crusts to make from scratch. You only need three ingredients: graham crackers, melted butter, and sugar. No mixer needed. Just stir everything together in a bowl with a spatula or fork until the crumbs look like wet sand.
If crushing graham crackers feels tricky, don’t worry. You can buy graham cracker crumbs at most grocery stores, and they work just as well. If you want to crush your own, a food processor makes it quick and simple. A small 4-cup food processor from Cuisinart is a great entry-level option for beginners.
You can read more about food processors for baking here, or check out my full step-by-step guide for making graham cracker crusts here.
Pie School Graduation: Make a Flaky Pie Crust:
If you want to go all the way to Pie School graduation, try making your own pastry crust. It takes a little more time but gives you that buttery, bakery-style taste. You can learn how in my Ultimate Guide to Pie Crust.

Chocolate Pudding Filling for Chocolate Cream Pie:
The pudding is the heart of a chocolate cream pie. It gives the pie its smooth, creamy texture and rich chocolate flavor. You can make this part as easy or as homemade as you like.
Easiest Filling for Chocolate Cream Pie:
The simplest way to make your pie filling is to use store-bought, ready-made chocolate pudding. You can use any brand you like. Just make sure you have about four cups of pudding total. If you’re using small pudding cups, like Jell-O or Snack Pack, each cup holds about half a cup, so you’ll need eight of them to fill one pie.
My personal favorite brand of ready-made, store-bought pudding is Kozy Shack. You’ll need two of the 22oz tubs to fill a pie.
Level It Up: Instant Pudding for Chocolate Cream Pie:
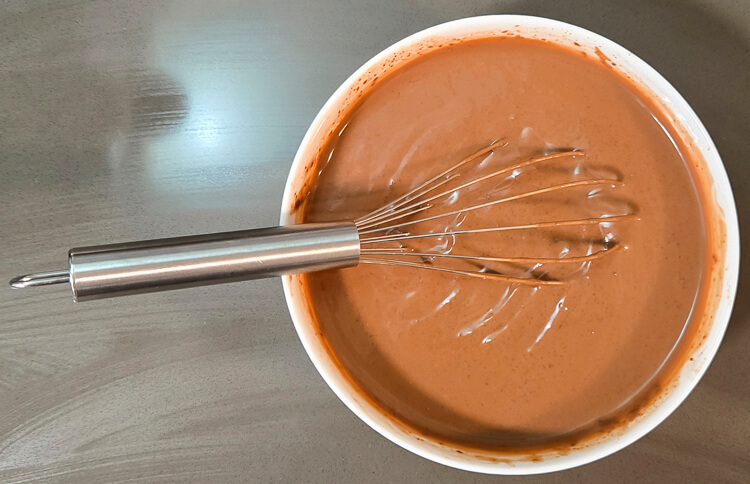
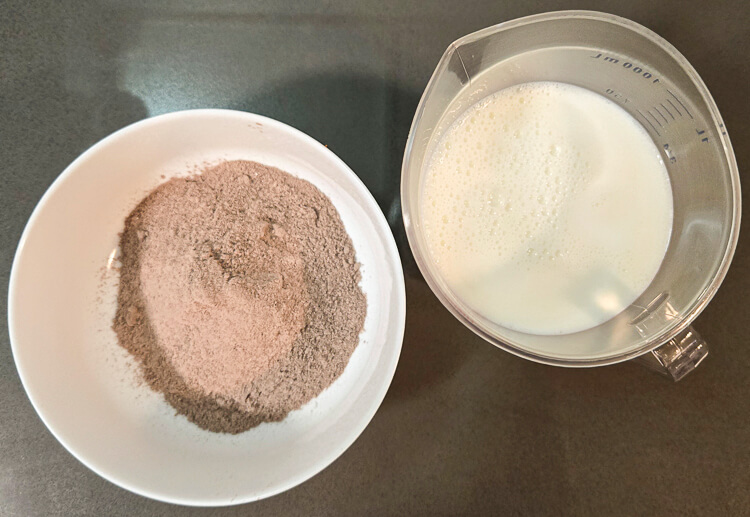
If you want to take one small step toward homemade, try instant pudding. You can find boxes of instant chocolate pudding in the baking aisle at most grocery stores. It’s still quick and easy, but it lets you do a little mixing yourself. You’ll want the package that’s closest to 6oz of instant pudding mix.
Follow the directions on the package, then pour the pudding into whichever crust you chose earlier. Most instant pudding mixes only need cold milk and a whisk. It’s a fun, low-stress way to feel like you made something from scratch.
How to Prevent Lumpy Instant Pudding:
Sometimes instant pudding can turn out a little lumpy. To keep your chocolate cream pie filling smooth and silky, try these simple tips:
- Start by whisking in just a small amount of milk (about 1 cup) with the pudding mix. Stir until you have a smooth paste before adding the rest of the milk.
- If your pudding is already lumpy, you can fix it by using a fine-mesh strainer. Pour the pudding into the strainer a little at a time, and use a spatula or spoon to press it through the holes. The strainer will catch the lumps and leave you with smooth pudding underneath.
Pie School Graduation: Homemade Chocolate Pudding:
When you’re ready for the full experience, try making homemade chocolate pudding from scratch. It’s rich, silky, and worth the extra effort. You can find the full recipe and all my tips for tempering eggs and straining pudding in my Homemade Chocolate Cream Pie post. Once you’ve mastered that, you’ll be ready for your official Pie School diploma.
Whipped Cream Topping for Chocolate Cream Pie:
Whipped cream is the perfect finishing touch for chocolate cream pie. It adds a light, fluffy layer that balances the rich chocolate pudding. You can keep this step super simple or make it fresh at home, it all depends on what you feel ready for.
Easiest Whipped Cream for Chocolate Cream Pie:
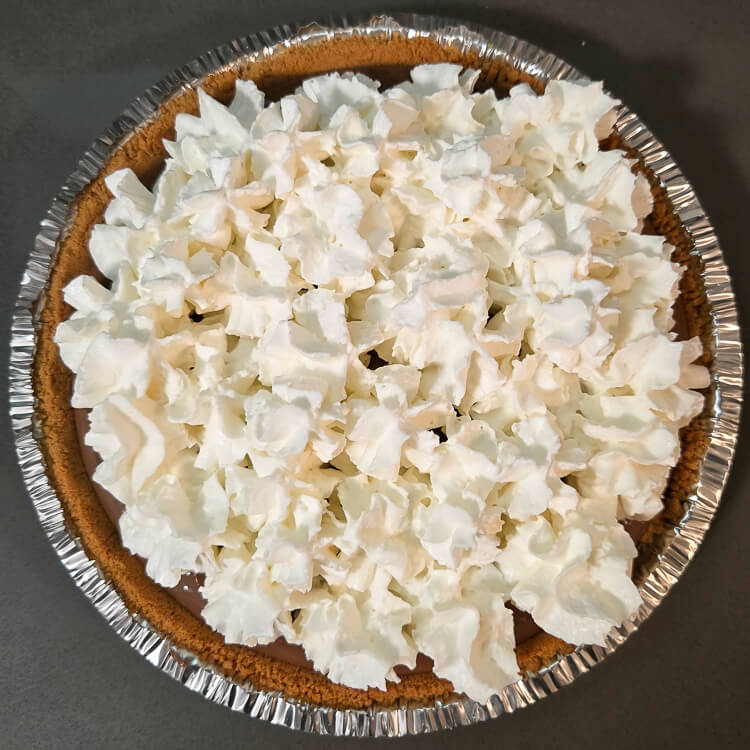
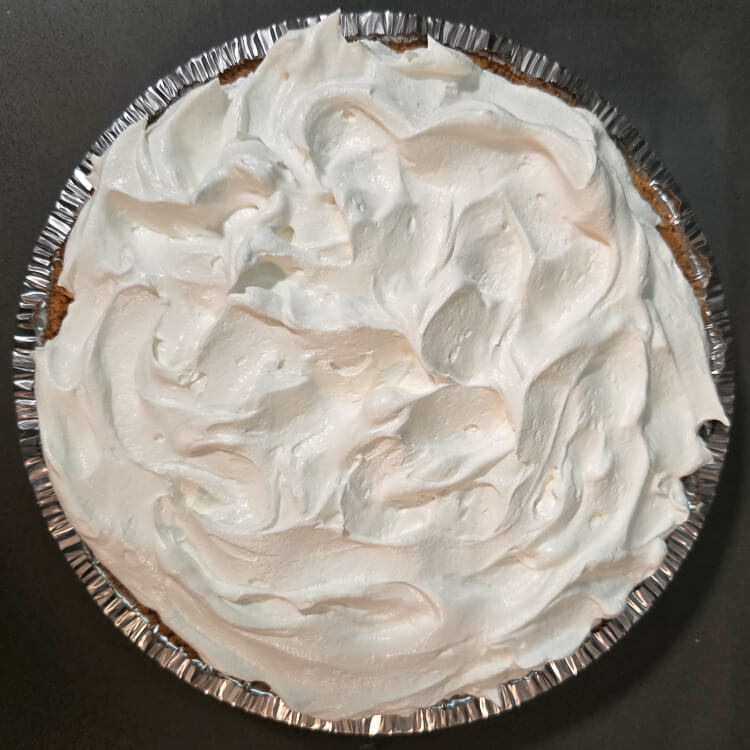
You can top your pie with canned whipped cream or Cool Whip straight from the container. Both work great. Sometimes, canned whipped cream can start to “weep,” which means a little water seeps out over time, so it is best to add it right before serving. Cool Whip keeps its shape for much longer, even for several hours.
If you are using canned whipped cream, spray it in little swirls or rings across the top of your pie. If you are using Cool Whip, spread it gently with the back of a spoon. Do not worry about getting it perfectly smooth. The spoon will leave pretty, natural-looking swirls.
Level Up: Fresh Whipped Cream:
Making whipped cream from scratch is easier than it sounds. You can use a milk frother, a hand mixer, or a stand mixer with a whisk attachment. In a clean bowl, whip together 1 cup of heavy whipping cream, ¼ cup of powdered sugar, and ½ teaspoon of vanilla extract until soft, fluffy peaks form. If you’re only making whipped cream from time to time, and you want a super small kitchen appliance, a milk frother is a great choice.
For the best texture, sift your powdered sugar through a fine-mesh sieve before adding it. Sifting breaks up any lumps and helps the whipped cream stay smooth and creamy. Spread your fresh whipped cream over the top of your pie with the back of a spoon, then admire your work. You have earned it.
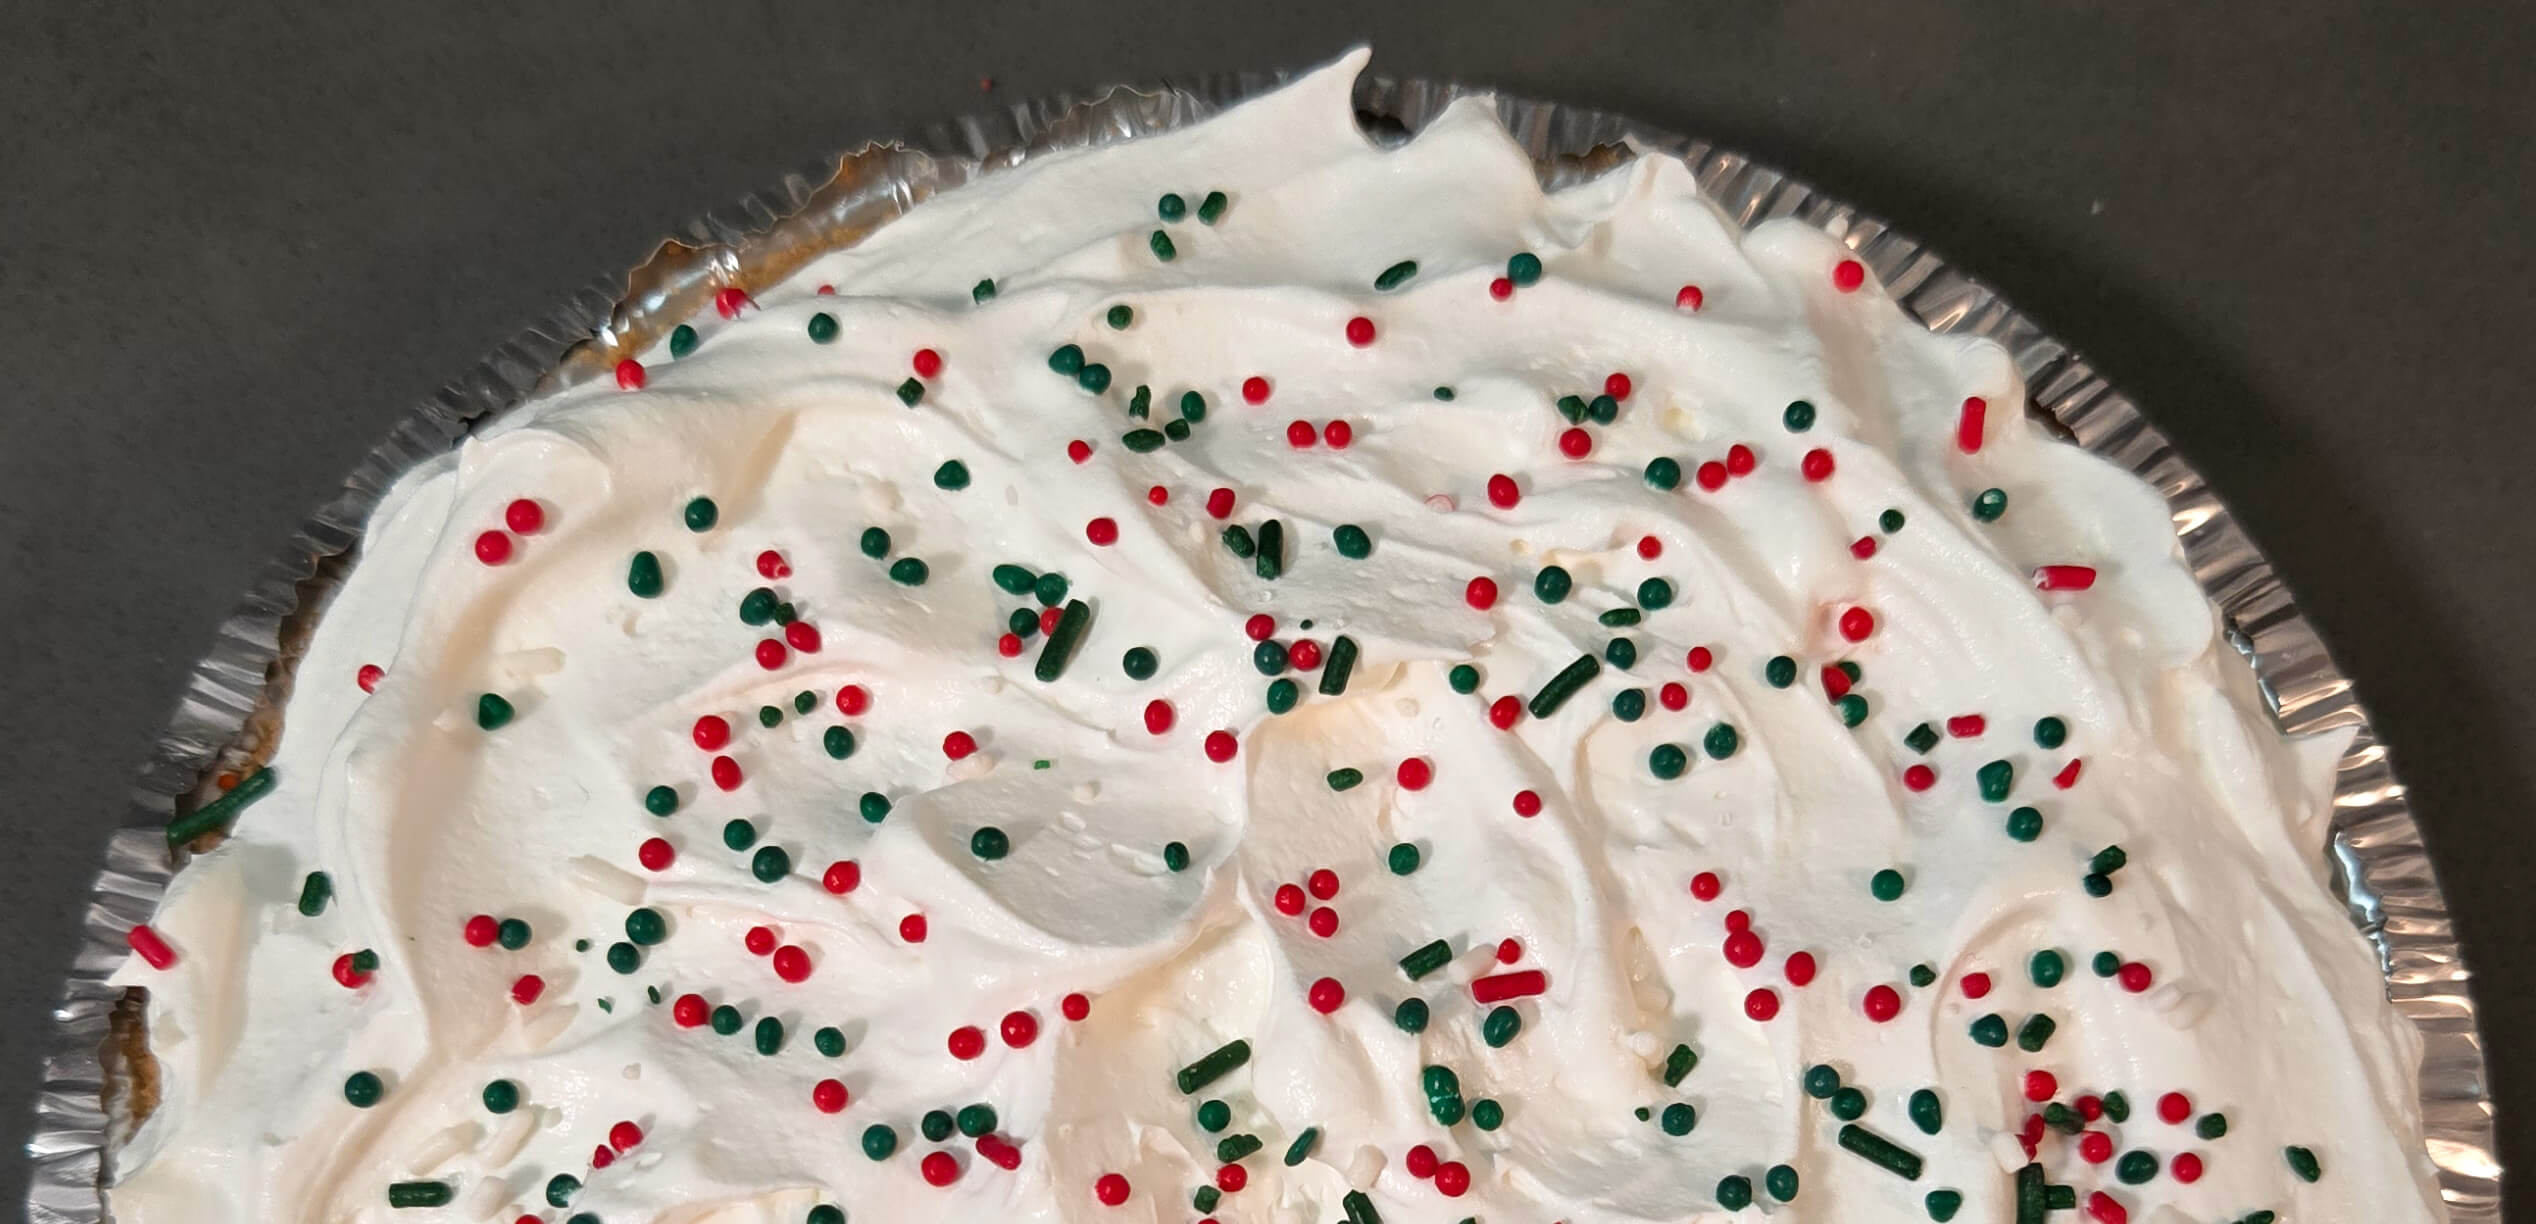
Fun Toppings for Chocolate Cream Pie:
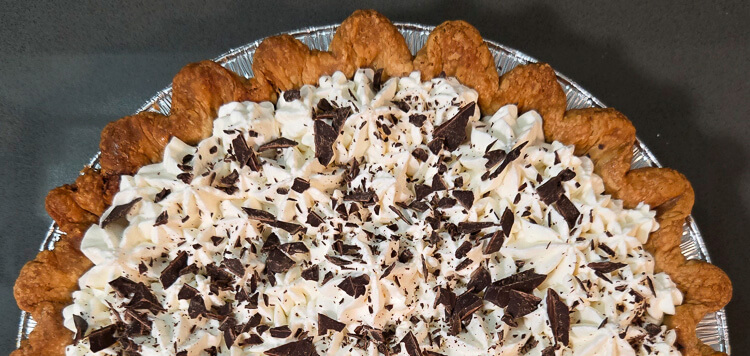
Once you have added the whipped cream, your chocolate cream pie is ready to serve. If you want to make it extra special, you can decorate it with fun toppings for any season or celebration.
- Syrups: You can find chocolate syrup, caramel syrup, or other dessert sauces at the store. Drizzle them over the whipped cream in zigzags or swirls for a quick and fancy finish.
- Chocolate Chips: Sprinkle a handful of chocolate chips over the top for a rich, extra-chocolatey touch. Mini chocolate chips work especially well because they spread evenly and add just the right amount of crunch.
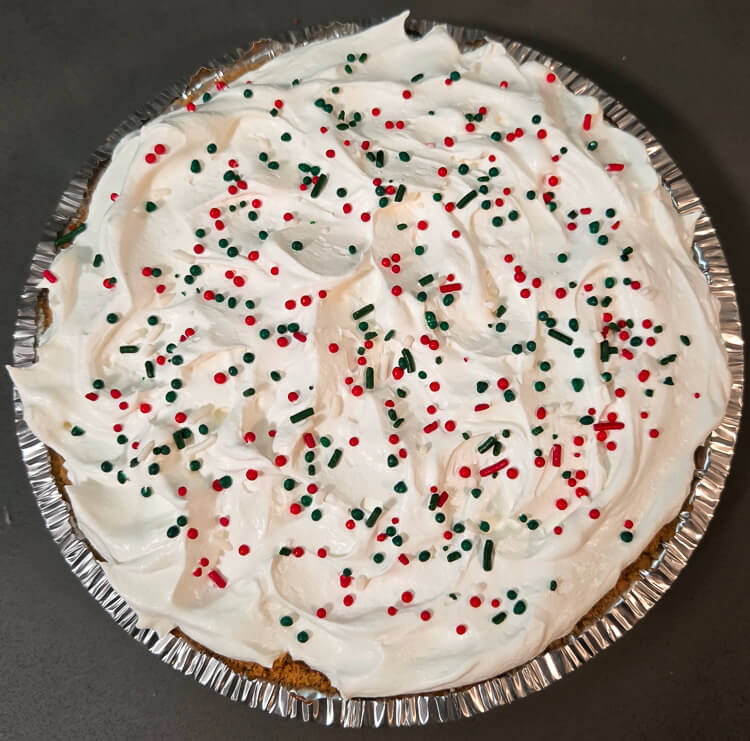
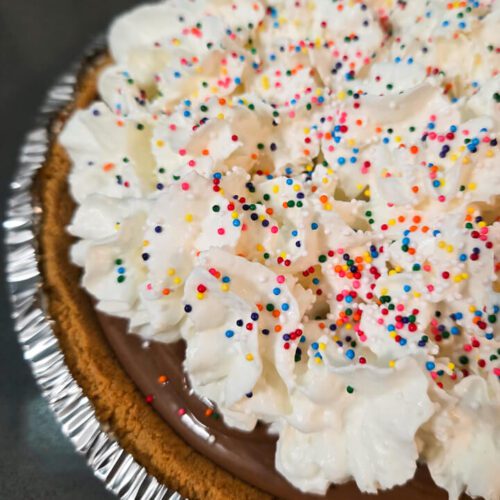
- Sprinkles: Colorful sprinkles make your pie feel festive. Use red and green for Christmas, orange and black for Halloween, or rainbow sprinkles for a birthday.
Decorating your pie can be the most exciting part. Have fun with it and make it your own. There is no wrong way to top a chocolate cream pie.
Step-by-Step Tutorial for an Easy Chocolate Cream Pie:
Ingredients
- 1 Store-Bough Graham Cracker Crust
- 1 5.9oz Package of Instant Chocolate Pudding
- 3 cups of Whole Milk (for instant pudding)
- 1 Container of Cool Whip
- Optional: Toppings such as sprinkles, chocolate syrup, or chocolate chips
1.
Preheat your oven to 350F (160°C).
2.
Place your empty graham cracker crust on the middle oven rack and bake for about 8 minutes.
3.
Carefully remove the crust from the oven using oven mitts and let it cool completely to room temperature.
4.
While the crust cools, follow the directions on your box of instant chocolate pudding to make the filling.
5.
Pour the chocolate pudding into the cooled crust, leaving about a quarter inch of space at the top. Use the back of a spoon to spread it evenly.
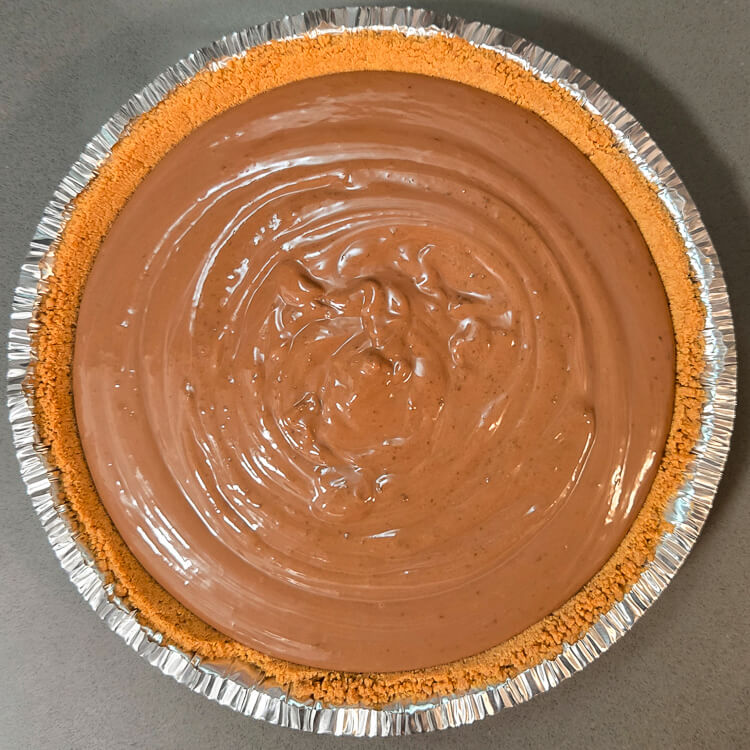
6.
Spread Cool Whip over the pudding with the back of a spoon. Add as much or as little as you like.
7.
Finish your pie with any toppings you love.
8.
Chill the pie for at least 30 minutes before serving so the pudding can set. Then slice, serve, and enjoy your easy chocolate cream pie.

How to Store Chocolate Cream Pie:
Chocolate cream pie keeps well in the refrigerator for up to five days. Over time, the crust may lose some of its crispness as it absorbs moisture from the pudding, but the flavor will stay just as delicious.
For best results, store your pie in a large, airtight container. Because the pudding and whipped cream both contain dairy, keep the pie refrigerated at all times except when serving.
Pro Tip: Place the pie right side up on the container lid, then close the bottom of the container over it. This way, you can remove or store the pie without reaching inside and risk smudging the whipped cream.
If you want your slices to look neat, let the pie chill for at least a few hours before cutting. Then enjoy a cool, creamy slice whenever you need a little chocolate treat.
We’d love to see your Pie School creations! If you give this recipe a try, tag @doggone_baking on social media so we can share in the baking fun.
Easy Chocolate Cream Pie for Beginner Bakers
Ingredients
- 1 Store-Bought Graham Cracker Crust or homemade
- 1 6oz Package Instant Chocolate Pudding
- 1 8oz Package Cool Whip (See notes for homemade)
- Toppings like Sprinkles or Chocolate Chips
Instructions
- Preheat your oven to 350F (160°C).
- Place your empty graham cracker crust on the middle oven rack and bake for about 8 minutes.
- Carefully remove the crust from the oven using oven mitts and let it cool completely to room temperature.
- While the crust cools, follow the directions on your box of instant chocolate pudding to make the filling.
- Pour the chocolate pudding into the cooled crust, leaving about a quarter inch of space at the top. Use the back of a spoon to spread it evenly.
- Spread Cool Whip over the pudding with the back of a spoon. Add as much or as little as you like.
- Finish your pie with any toppings you like.
- Chill the pie for at least 30 minutes before serving so the pudding can set. Then slice, serve, and enjoy your easy chocolate cream pie.
Notes
- 1 cup Heavy Whipping Cream
- 1/4 cup Powdered Sugar (sifted)
- 1/2 teaspoon Vanilla Extract

About Me
In 2016, I left my office job and became a professional baker. These days I spend my days testing recipes and baking pies while my two dogs snooze happily nearby.
See My Full Bio
2 responses to “Easy Chocolate Cream Pie | Pie School Series”
-
This looks so delicious! Do you think it would still work with gluten and dairy-free substitutes? I would love to make this for family holidays this year!
-
Yes! Use any dairy-free pudding you prefer. Finding dairy-free and/or gluten-free substitutes for store-bought graham cracker crust might be difficult, but adapting homemade graham cracker crust is pretty straightforward.
-


Leave a Reply