This post may contain affiliate links. Please read my disclosure policy.
All recipes on Doggone Baking are intended for humans — the dogs are just our enthusiastic photo assistants and taste-test spectators.
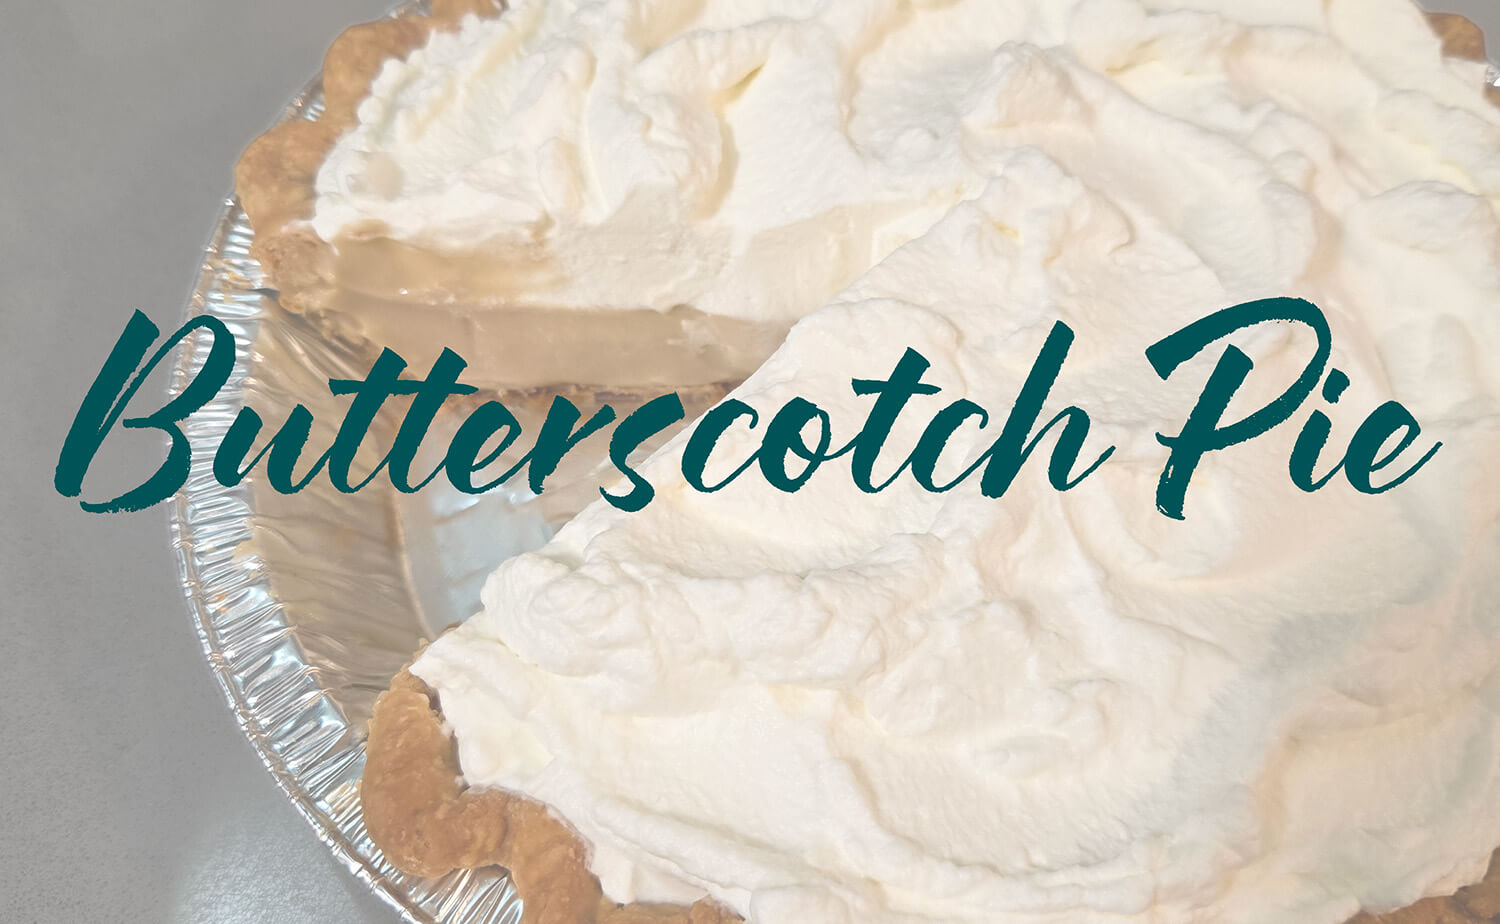
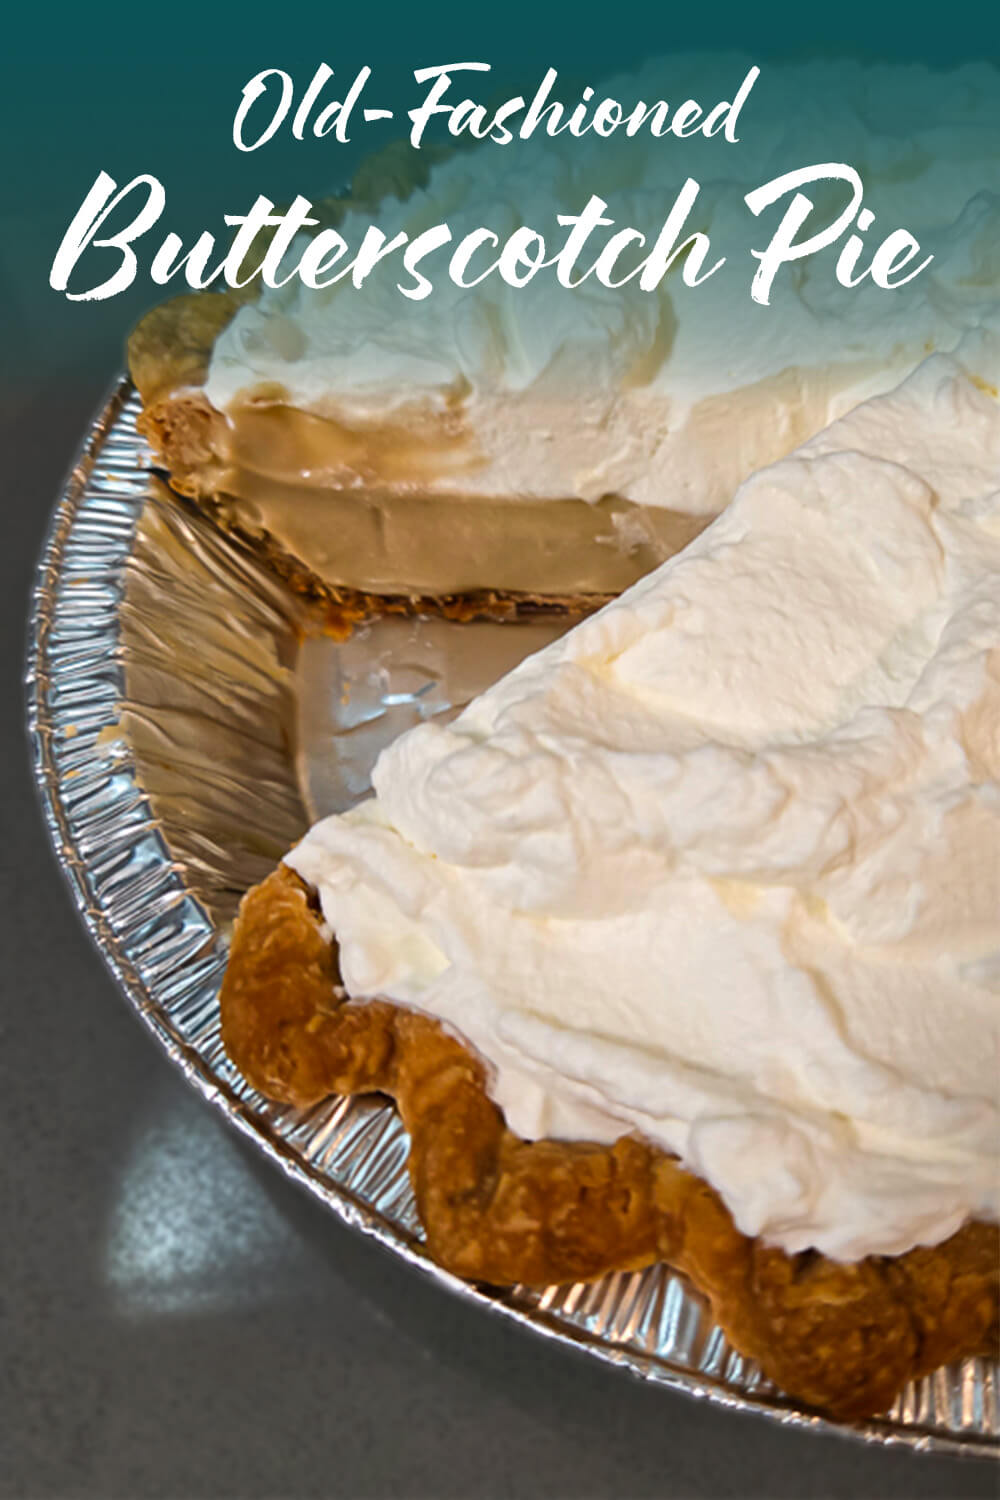
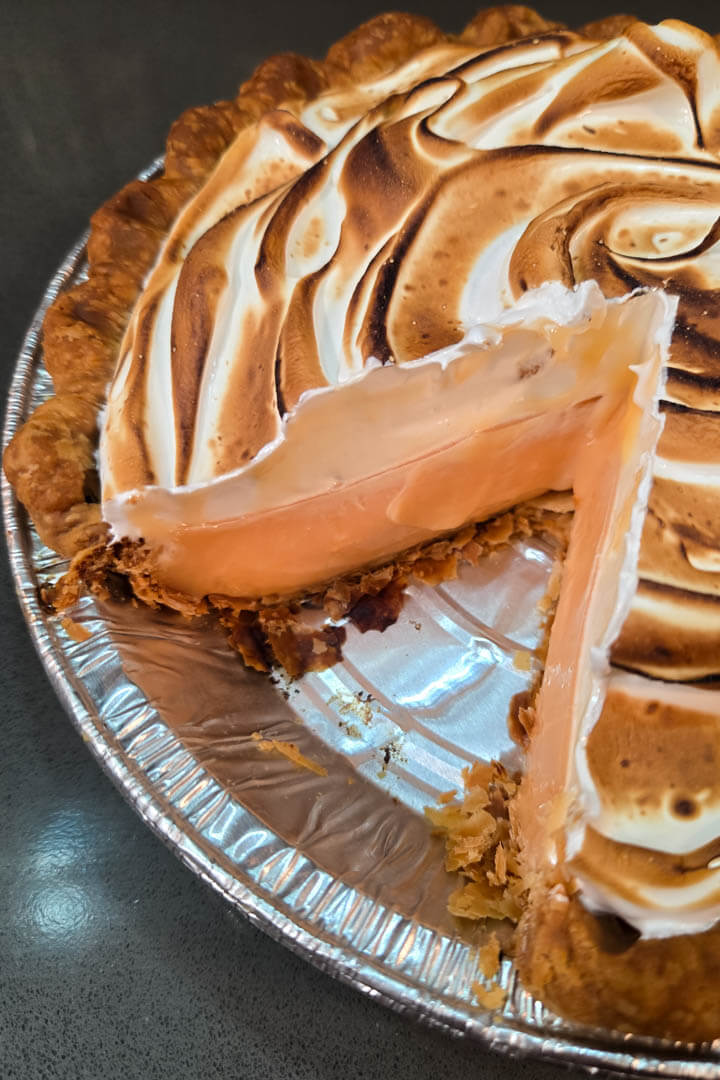
Old-Fashioned Butterscotch Pie
Butterscotch pie, once a household favorite in the first half of the 20th century, is a vintage dessert that deserves a comeback. With its mellow, caramel-like flavor and silky cream filling, this pie is light but sweet. It’s perfect for summer gatherings or cozy fall days. Finish your butterscotch pie with fresh whipped cream or go for the full vintage look with a toasted meringue top.

What is Butterscotch Pie?
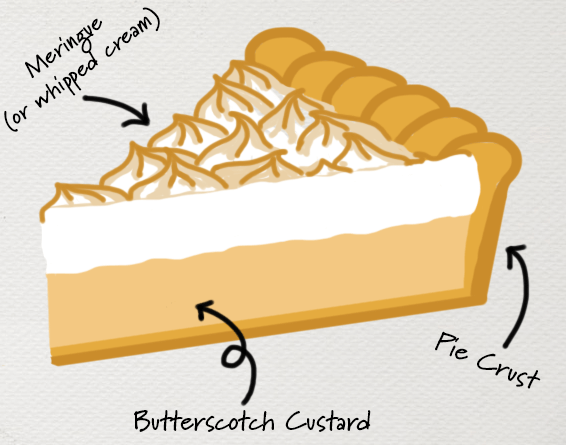
Butterscotch pie is a vintage pie that was popular in the early 20th century. It’s a classic cream pie, and the filling is a smooth, light pudding flavored with homemade butterscotch. The original recipes, like many cream pies of old, called for a meringue topping. Because custard uses egg yolks, economical bakers would whip the leftover egg whites into meringue instead of letting them go to waste. Nowadays, thanks to more reliable home refrigerators and freezers, cream pies are often topped with whipped cream and the egg whites can be used for other recipes.
What is Butterscotch?
Butterscotch is believed to have been first created in Doncaster, England in 1817. Sometimes considered caramel’s easier and less fussy cousin. While caramel requires close attention and can still be easily disturbed causing clumping, recrystallization, and burning, butterscotch is quick and easy and much more forgiving.
The main difference comes down to the sugar. Caramel is made by melting white sugar until it caramelizes, while butterscotch is made by melting brown sugar with butter. The molasses in brown sugar adds acidity, which helps prevent the crystallization that can often make caramel so temperamental.
In terms of taste, butterscotch and caramel are similar but distinct. Caramel is sharper, toastier, and a tad bitter, while butterscotch is mellower and more buttery, with warm notes of toffee and molasses. That smooth, rounded flavor is what makes butterscotch so versatile. It shines in sauces, candies, puddings, and, of course, butterscotch pie.

The History of Butterscotch Pie
The history of butterscotch pie traces back to the early 20th century. The story goes that Sarah Wheeler or Wheeler’s Creamerie Exchange in Connersville, Indiana accidentally created the pie around 1904. Her sons claimed that while making them a cream pie, she was distracted by a customer, burned the customer, and ended up with a delicious butterscotch cream. From that point, a delicious new pie was born – or so the story goes.
I have my doubts about how accurate this folktale really is. For one, having burned my fair share of stovetop puddings, I can say the result is rarely (or never) a delicious, sweet pudding. More often, the result is bitter, charred milk solids scorched to the bottom of your pot. Secondly, the cream for butterscotch pie requires a deliberate step before making the pudding. Namely, you need to actually make butterscotch. The idea that the creation of the butterscotch pudding was entirely the result of a mishap seems unlikely.
What is undeniable, however, is the effectiveness of the Wheeler family’s marketing. Sarah Wheeler first published her butterscotch pie recipe in a Methodist church cookbook in 1904, giving it a foothold in the community. Then, her sons spread the story far and wide, and eventually capitalized on its popularity by selling the pie in their restaurant, Wheeler’s Lunch, which opened in 1924. The restaurant expanded to eight locations, and the pie became one of their signature desserts. By the mid-1930s, butterscotch pie recipes were being reprinted in cookbooks across America.
Although butterscotch pie was once a nationwide favorite, its popularity has waned considerably in the last half-century. Today, you may still find it included in modern pie cookbooks, but it’s usually categorized as “old-fashioned.” That’s too bad because, unlike some vintage dessert recipes, butterscotch pie easily stands the test of time. It’s a wonderfully light, mellow, and sweet cream pie that feels just as satisfying today as it did a century ago.
Step-by-Step Butterscotch Pie Recipe:
Crust:
Like most cream pies, you’ll want a fully baked pie crust for this pie.

Butterscotch Custard:
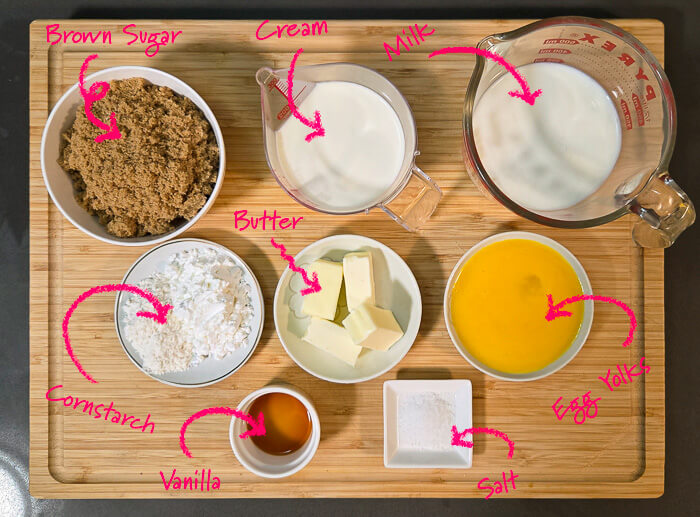
Ingredients
- 400mL Whole Milk (1⅔c)
- 200mL Heavy Whipping Cream, divided (3/4c + 1.5T)
- 1c Brown Sugar (200g)
- 4 Egg Yolks
- 1¼ t Vanilla Extract
- ½ t Salt
- Corn Starch (25g)
- 1T All-Purpose Flour (8g)
- 5T Unsalted Butter, cubed
Make the Butterscotch:
To make butterscotch custard, you first have to make the butterscotch itself. All in all, it’s fairly straightforward and much easier than making similarly-tasting caramel sauce.
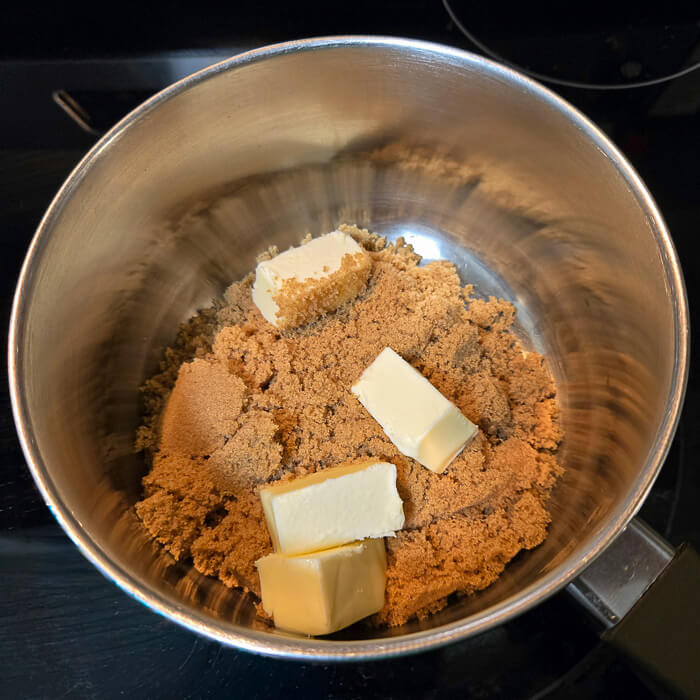
1.
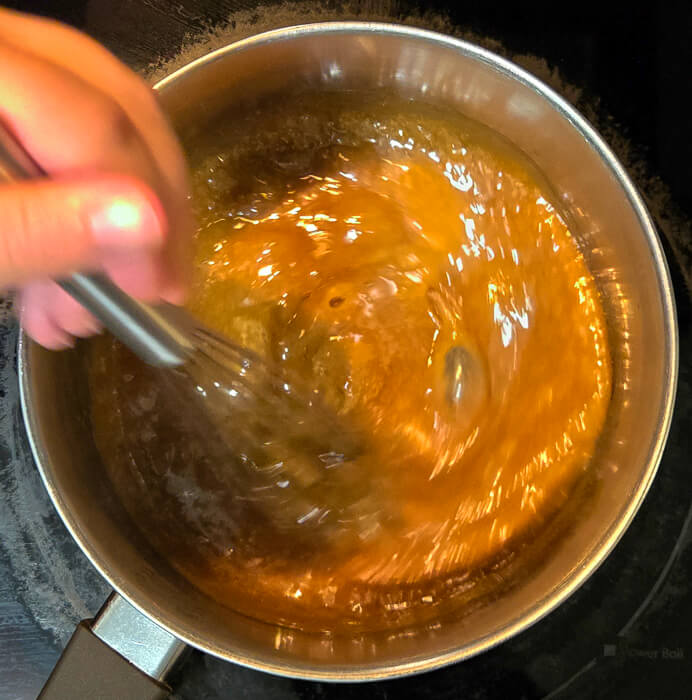
In a pot on medium-low heat, melt the butter and brown sugar together.
2.
Once the butter has melted, whisk until combined, then continue heating until the mixture is bubbling gently and the brown sugar is fully melted.
3.
In a microwave safe container, heat half of the heavy whipping cream (100mL) until scalding, about 30 seconds.
Pro Tip: You can also heat the cream on the stove, but with such a small amount, the microwave is usually more convenient.
4.
Carefully whisk in the hot cream until the mixture is smooth and fully incorporated.
5.
Continue letting the mixture bubble for about 1 minute.
6.
Remove the pot from the heat, and whisk everything together once more.
Make the Butterscotch:
7.
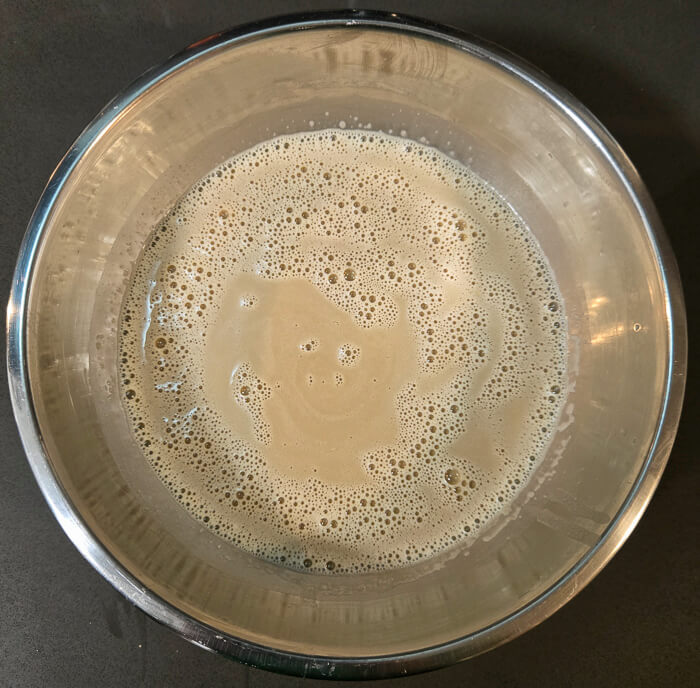
In a large mixing bowl, whisk together the egg yolks, cornstarch, flour, and the remaining heavy whipping cream (100mL).

Make sure the bowl is large enough to hold all of the custard later. You’ll be pouring the milk and butterscotch into this bowl to temper the eggs.
8.
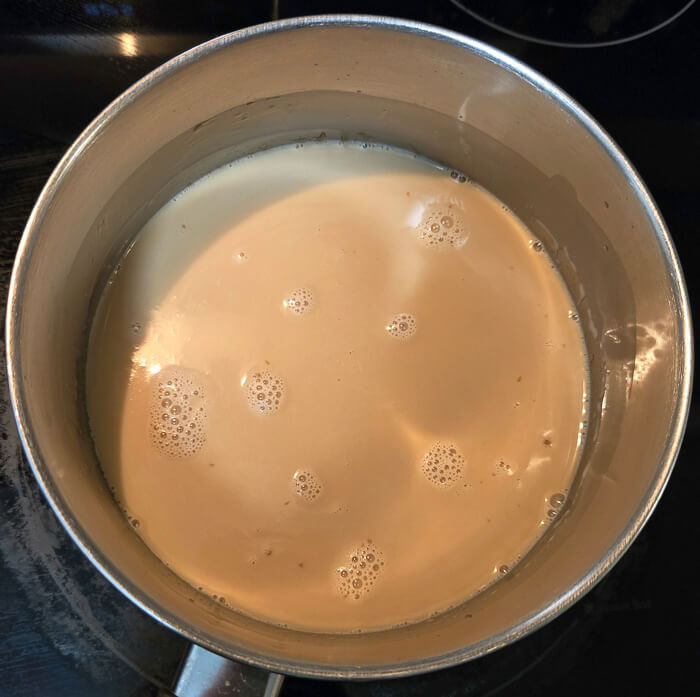
In a separate pot on medium heat, bring the milk to just under a boil.
9.
Combine the hot milk and the butterscotch, whisking until fully blended.
10.
Temper the egg yolks. Tempering your eggs is a crucial step for a smooth, silky custard. Tempering your eggs ensures that you don’t end up with scrambled eggs in your final custard! While whisking continuously, very slowly pour the hot milk into your egg yolks, cornstarch, flour, and cream. After you’ve incorporated about half of your hot milk, you can begin adding it in more quickly, making sure to never stop whisking.
11.
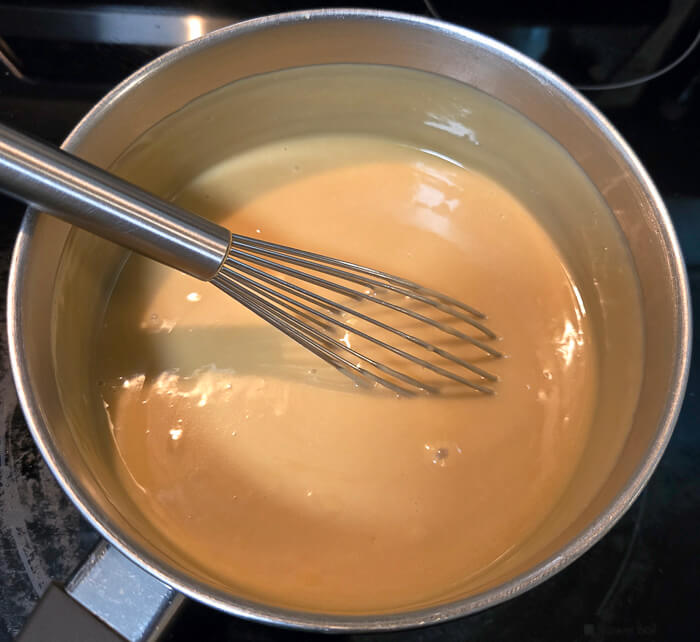
Return the entire mixture to your pot, and place on low heat, whisking continuously until the mixture begins to thicken and the first few bubbles appear as it begins boiling.
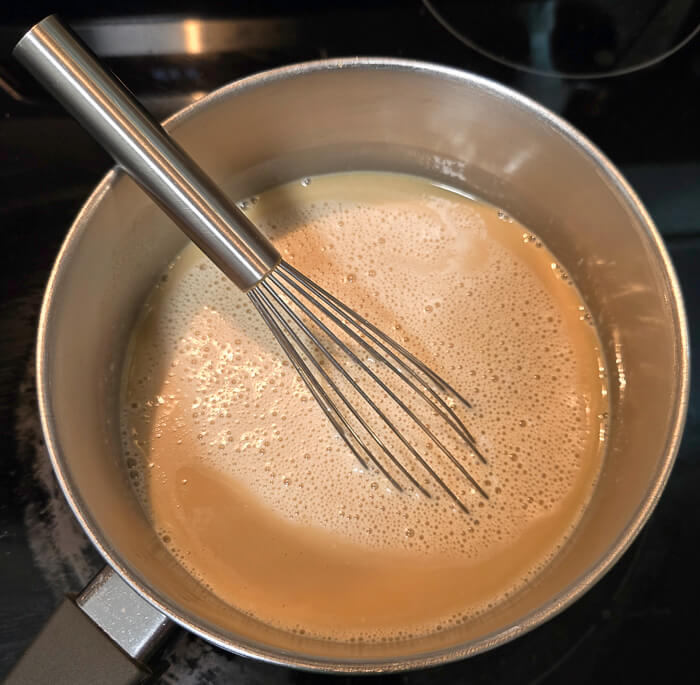
Cornstarch doesn’t fully activate until it’s been heated to a boiling point. If you don’t get the custard hot enough, it may remain slightly grainy after it cools.
12.
Once boiling, whisk vigorously for 30-60 seconds to fully cook the cornstarch and ensure a smooth butterscotch custard.
13.
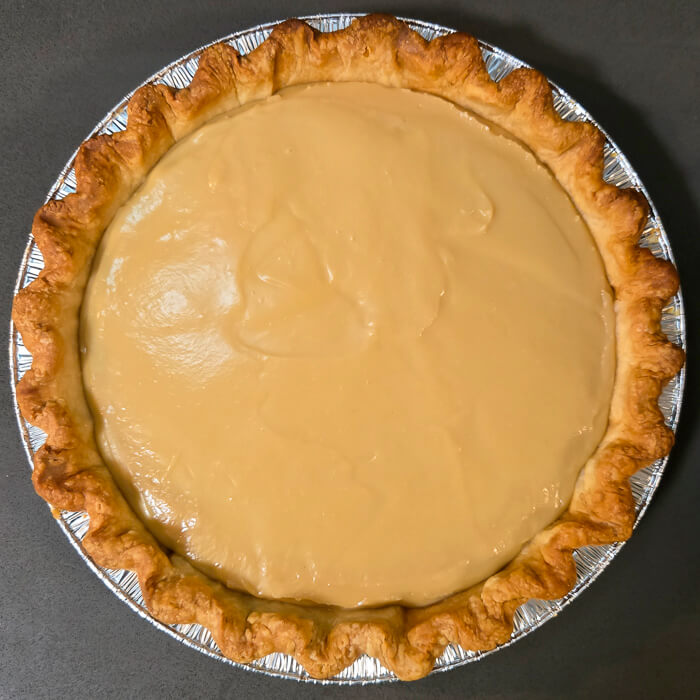
Strain the butterscotch custard through a fine-mesh sieve directly into your prepared, fully baked pie crust. Straining the cream ensures that you strain out any clumps that may have formed during the cooking process.
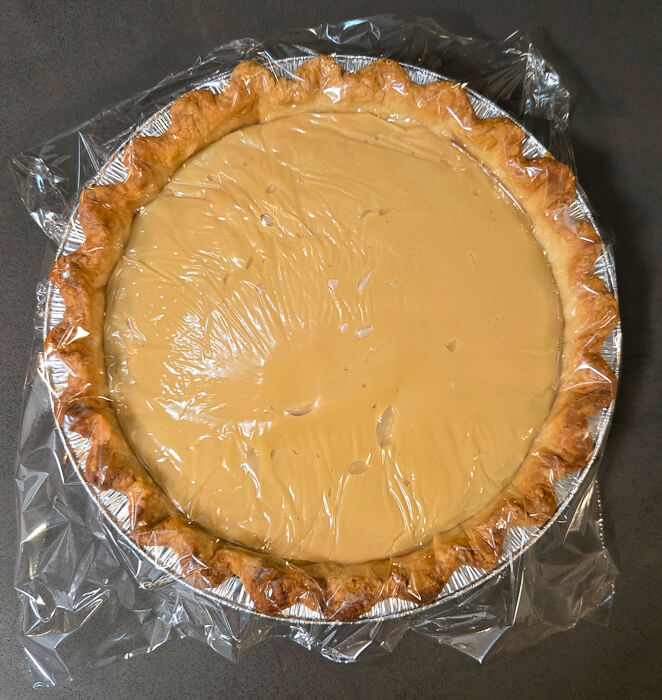
14.
Press a piece of plastic wrap directly onto the surface of the custard to prevent a skin from forming. Refrigerate for at least 3 hours, or until the filling is fully set.
Top Your Pie
After chilling for at least 3 hours, remove the butterscotch pie from the refrigerator and peel off the plastic wrap. Add your topping of choice:
- For an old-fashioned look, finish with a toasted meringue.
- For a more modern look, pile on some whipped cream.
Slice, serve, and enjoy!

How to Store Butterscotch Pie
Butterscotch pie must be refrigerated. Because the filling is a custard, it isn’t shelf-stable and should always be kept chilled and also tastes best served chilled. You can store butterscotch pie in your refrigerator for about 3 days before the crust begins to soften. The custard itself can last 7-10 days, but after a few days the crust may turn soggy and lost its crispiness.
Make Ahead Tip:
To save time, you can pre-bake your pie shell up to a week in advance. Store the baked crust at room temperature, wrapped tightly in plastic wrap to keep out moisture. Before making your filling, refresh the crust by baking it for 5-10 minutes at 350°F.

Old-Fashioned Butterscotch Pie
Ingredients
Crust
Butterscotch Cream
- 400 mL Whole Milk (1⅔ cups)
- 200 mL Heavy Whipping Cream, divided (¾ cup + 1½ tbsp)
- 1 cup Brown Sugar (100g)
- 4 Egg Yolks
- 1¼ tsp Vanilla Extract
- ½ tsp Salt
- 3 tbsp Cornstarch (24g)
- 1 tbsp All-Purpose Flour
- 5 tbsp Unsalted Butter, cubed
Whipped Cream
- 1 cups Heavy Whipping Cream (355mL)
- 4 tbsp Powdered Sugar, sifted
- ½ tsp Vanilla Extract
Instructions
Prepare a Pie Crust
- Before beginning to make this pie, prepare a fully-baked pie shell. Instructions can be found here. This pie also works with almost any other type of pie crusts of your choosing.
Make the Butterscotch
- In a small pot on medium-low heat, melt the brown sugar and butter together. Whisk gently to combine.
- In a microwave or on your stovetop, warm half of the heavy whipping cream (100mL) until it's hot to the touch or just before it starts boiling.
- When the butter and brown sugar mixture is bubbling, slowly pour the heavy cream into the mixture, whisking continuously.

- Continue cooking for about 1 minute, stirring continuously.
- Remove the butterscotch from the heat and set aside.

Make the Butterscotch Cream Filling
- In a large mixing bowl, whisk together the egg yolks, cornstarch, flour, salt, and remaining 100mL of heavy cream.
- In a separate pot, heat the milk until it's just under a boil.
- Pour the milk into the butterscotch from earlier and whisk to combine.
- Temper the egg yolks by very slowly pouring the milk and butterscotch mixture into the egg yolk mixture while whisking continuously.
- Pour the entire mixture back into a pot and place back over low heat.
- Stir continuously with a whisk, wooden spoon, or rubber spatula, scraping the bottom of the pot until the mixture begins to thicken.
- When the first few bubbles break the surface of the custard as it begins to boil, whisk vigorously for 60 seconds to ensure that the cornstarch cooks fully.
- Strain the custard through a fine-mesh sieve directly into your prepared pie shell.
- Press a piece of plastic wrap directly to the surface of the custard, and refrigerate for at least 3 hours, or until the filling has set.


Make the Whipped Cream
- In a stand mixer fitted with a whisk attachment, whip heavy cream, powdered sugar, and vanilla together on high speed until you get your desired whipped cream consistency.*
- Remove your cooled pie from the refrigerator and carefully peel the plastic wrap off of the top.
- Spread the whipped cream over the top of your pie using the back of a spoon or an offset spatula.
- Slice and serve!

Notes

About Me
In 2016, I left my office job and became a professional baker. These days I spend my days testing recipes and baking pies while my two dogs snooze happily nearby.
See My Full Bio
2 responses to “Old-Fashioned Butterscotch Pie Recipe”
-
Just made this old-fashioned butterscotch pie—rich, creamy, and full of classic sweet goodness! ✨ -
So happy I found this recipe! I haven’t had a butterscotch pie in forever!

Leave a Reply